I must say that this trick is no longer available as installation easier but only by editing the HTML template version. So if you want to have navigation numbers at the end stations must be armed with patience, attention and trust.
Adding code to trick
Step 1 . Go to Layout - Edit HTML and the first thing you need to do is save a copy of the template in the computer, because if something goes wrong you can simply return to it's load.
Step 2 . Step two is to add code Css Button. Here Abu Farhan created six different styles of buttons. You choose the code for the style you think fits best with your template.
Leave unchecked expansion box template. Find this code: ]]> </ b: skin> (use Ctrl + F for an easier search) and the sight of a copy of the codes below:
Step 3 . Adding script Java / Script dealing with transformation of the old Navigation Newerand Older Post in navigation issues.
For script code looking to add this code: </ body> (use Ctrl + F - is the very end code) andbefore his add this group: <! - Code NavigationCustomization
-> <script type='text/javascript'>
home_page var = "/"
var urlactivepage = location.href;
var postperpage = 4 ;
var numshowpage = 3 ;
var upPageWord = 'Prev',
lime downPageWord =
'Next'; </
script> <script src='http://navigatiecunumere.googlecode.com/files/navigatiecunumere1.js' type='text/javascript'> </ script>
<! - Code Navigation-http :/ / bmybloggertricksandtipssite.blogspot.com-->
Here To customize the navigation display should change as follows:
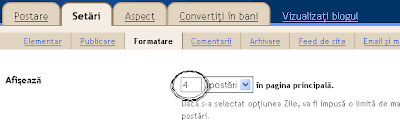
The number 4 represents the number of posts that will be displayed on the first page. Give the value you want, but must necessarily put the same number of posts here: Settings -> Format -> Display .
Number 3 is the number of digits that appears on the left and RIGHT selected page number. Give the value you want, but be careful menu is not too bad lateasca
Now you can save the template and check if it works navigation.For browsing to work with numbers and categories (labels) must follow and next steps. If you want the navigation to work only on the main page then you can stop here.
Step 4. Navigation for categories
in the first phase, if you have the gadget with labels added on the blog go to Layout - Page Elements - Add a Gadget and choose Tags , then go back to Layout - Edit HTML and this time check box to extend the template html code.
You can save a copy of the pattern here, different from the first. If there are mistakes you can still return to the original pattern, but not to repeat the steps above.
Using Ctrl + F find this line:
(make sure that is 2 times) <a expr:dir='data:blog.languageDirection' expr:href='data:label.url'> <Date: label.name /> </ a>
After you have found it, replace it with this group of codes (both existing lines):
<script type='text/javascript'>Figure 4 of this code is the number of posts that will appear on the category page, and is very important to be as the number of posts that appear on the homepage. That's all, but as you see it is quite complicated so be careful How about.
var lblname = "<data:label.name/>";
lblname2 = encodeURIComponent(lblname);
var feedlink = '/search/label/' + lblname2+'?&max-results=4';
document.write('<a href="' + feedlink + '">'+lblname+'</a>');
</script>
Enjoy !


No comments:
Post a Comment